Keyword files (CSV upload)
A keyword file is a Google Ads Search Terms report uploaded as a CSV — QueryGuard runs the same waste analysis on it without needing a connected account.
Overview
Keyword files are the way in when connecting Google Ads isn't an option or isn't worth it:
- Starter — the free plan has no connected accounts, so keyword files are how you analyze spend on it (up to 10 files at a time — see Plans and billing).
- One-off audits — analyze a client or prospect account you'd rather not connect.
- Fixed snapshots — the file covers exactly the date range you exported, and never changes.
Files live under Keyword Files in the sidebar; the same section also sits at the bottom of the dashboard. They belong to your organization rather than a workspace — everyone on the team sees every file.
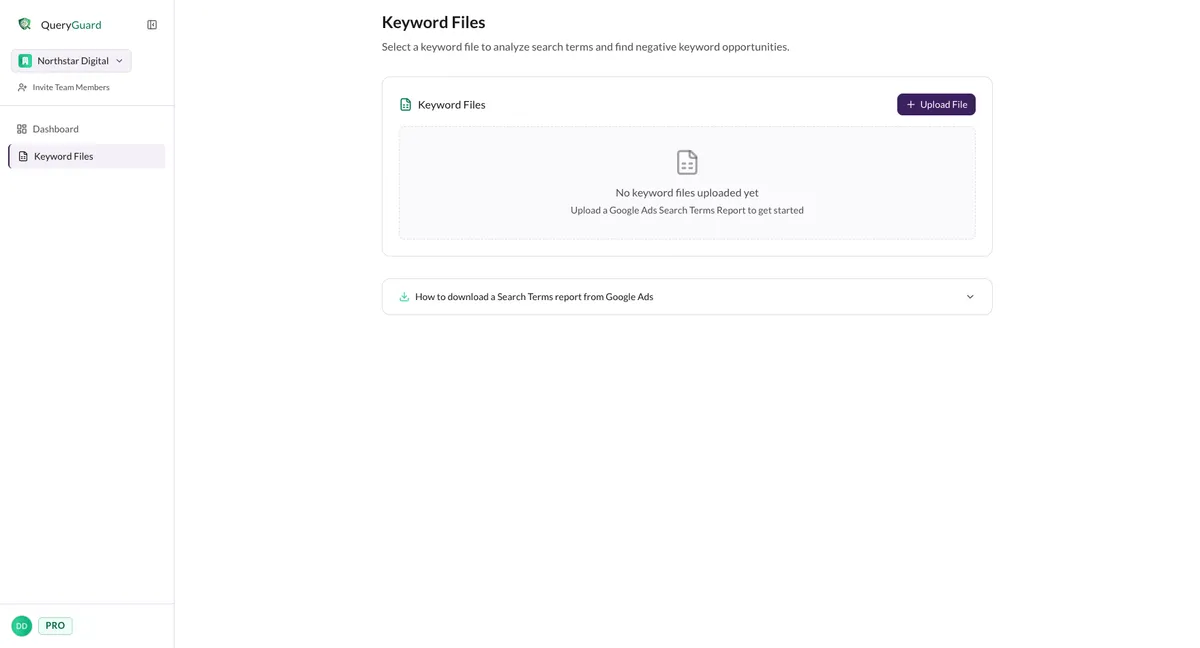
Each uploaded file gets its own page with a Waste Report and a Data Explorer built from the file's data — the same waste categories and term table a connected account gets, minus the parts that need a live connection.
Direct link: Keyword Files
Quick Tips
- Keep the default columns when you download the report — QueryGuard maps them automatically, no customization needed.
- The Client Name you set on the preview step becomes the file's name everywhere. Name it for the account the report came from.
- A file is a snapshot and never re-syncs. For fresh numbers, download a new report and upload it again.
- If the report's Added/Excluded column marks terms already covered by negatives, those terms carry an Excluded badge in the file's Data Explorer.
- On Starter, a meter above the list tracks N of 10 files uploaded. Deleting a file frees the slot; at the cap, Upload File becomes an Upgrade to Add More link.
Steps
1. Download the Search Terms report from Google Ads
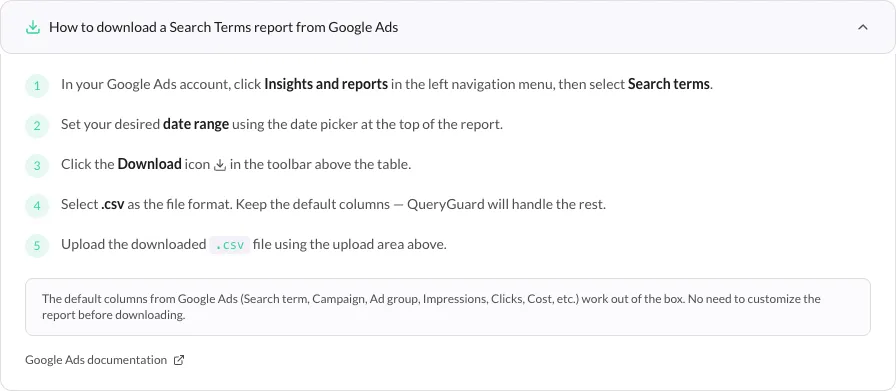
The How to download a Search Terms report from Google Ads panel on the Keyword Files page walks through this in-app. In short:
- In your Google Ads account, click Insights and reports in the left navigation, then select Search terms.
- Set your desired date range with the date picker at the top of the report.
- Click the Download icon in the toolbar above the table.
- Select .csv as the file format, keeping the default columns.
- Upload the downloaded
.csvin QueryGuard.
2. Start the upload
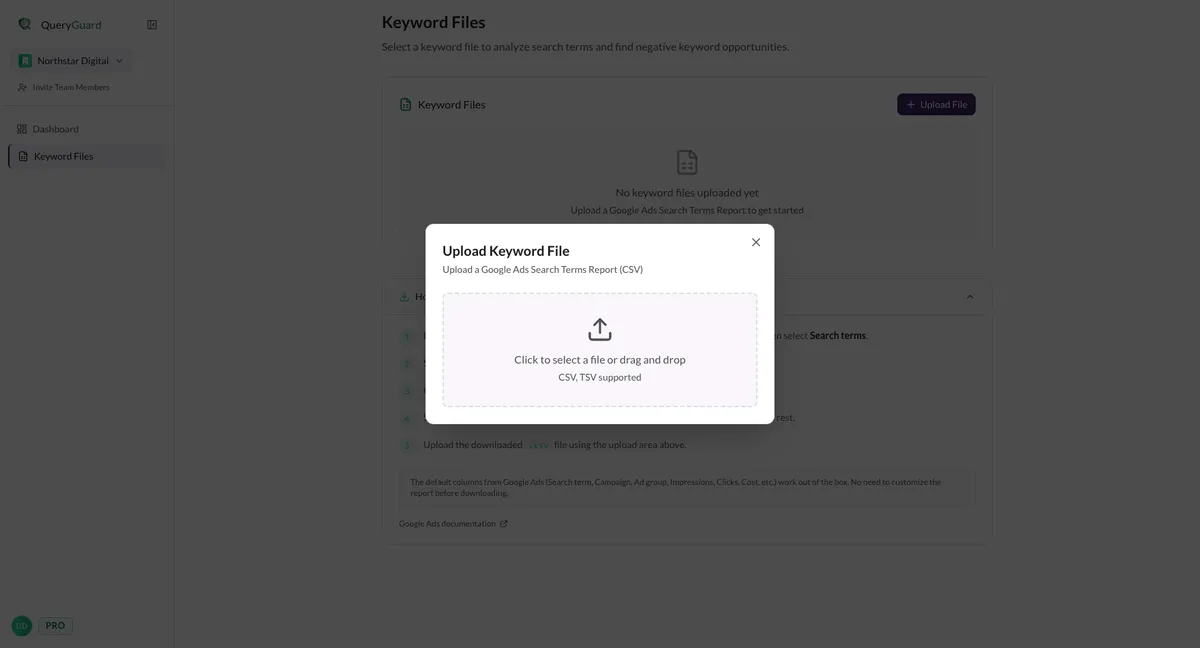
Choose Upload File on the Keyword Files page (or in the same section at the bottom of the dashboard). In the Upload Keyword File window, click the drop zone to browse for the file or drag it in — CSV and TSV are supported.
3. Map the columns
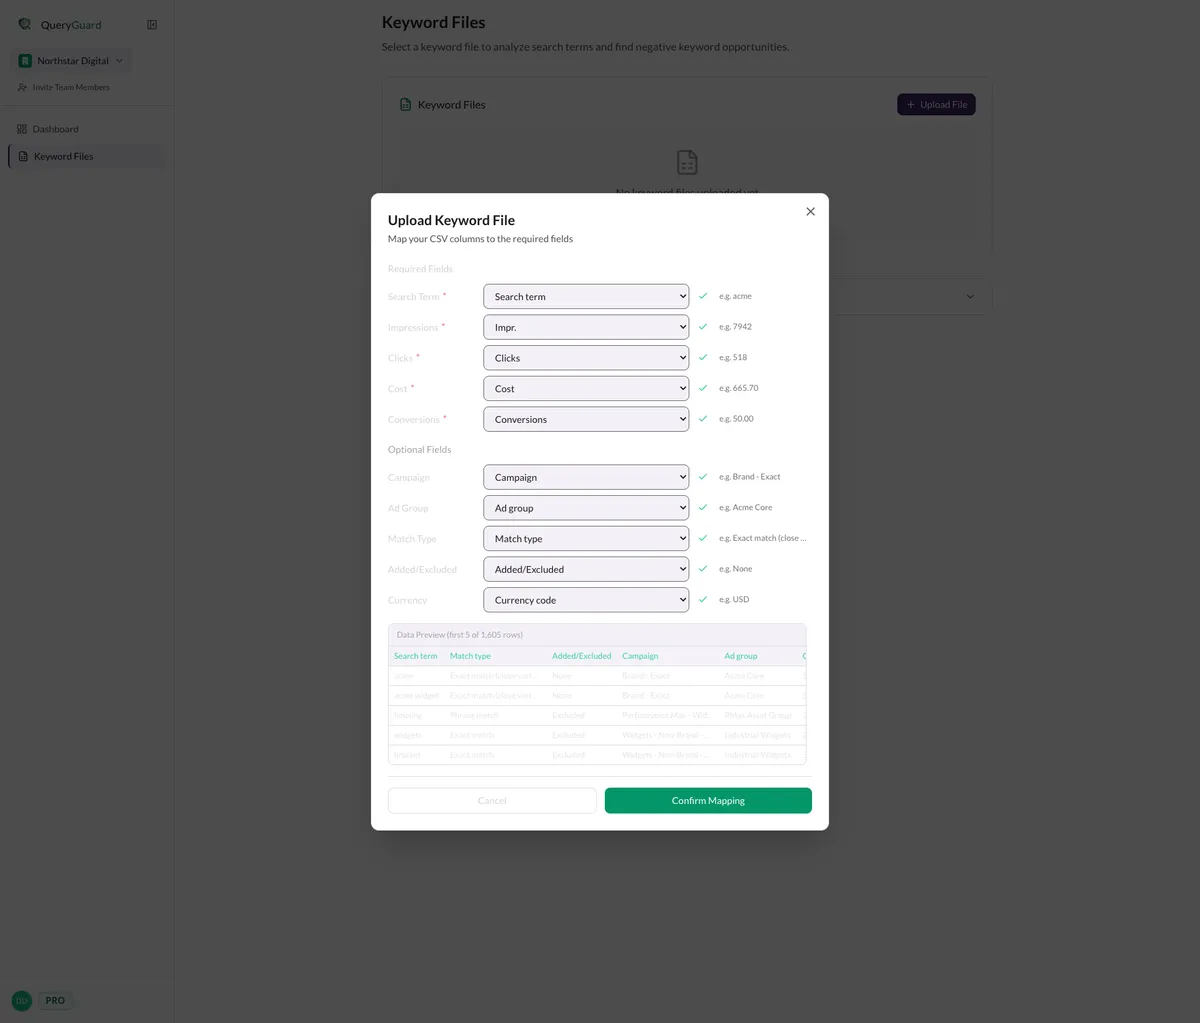
QueryGuard analyzes the file and matches its columns to the fields it needs. A standard Google Ads export maps every field automatically:
- Required Fields — Search Term, Impressions, Clicks, Cost, Conversions.
- Optional Fields — Campaign, Ad Group, Match Type, Added/Excluded, Currency.
Each field shows the matched column with sample values from your file, and the Data Preview table shows the first rows so you can check the match. If a required field can't be detected, an Unmapped Required Fields callout lists it — pick the right column from its dropdown. Confirm Mapping stays disabled until every required field is mapped.
4. Review the preview and upload
The preview step confirms what will be imported: the file name and row count, an editable Client Name (required — prefilled from the report's title), the report's Date Range, and a stats summary covering Total Spend, Total Clicks, Conversions and Terms with Spend.
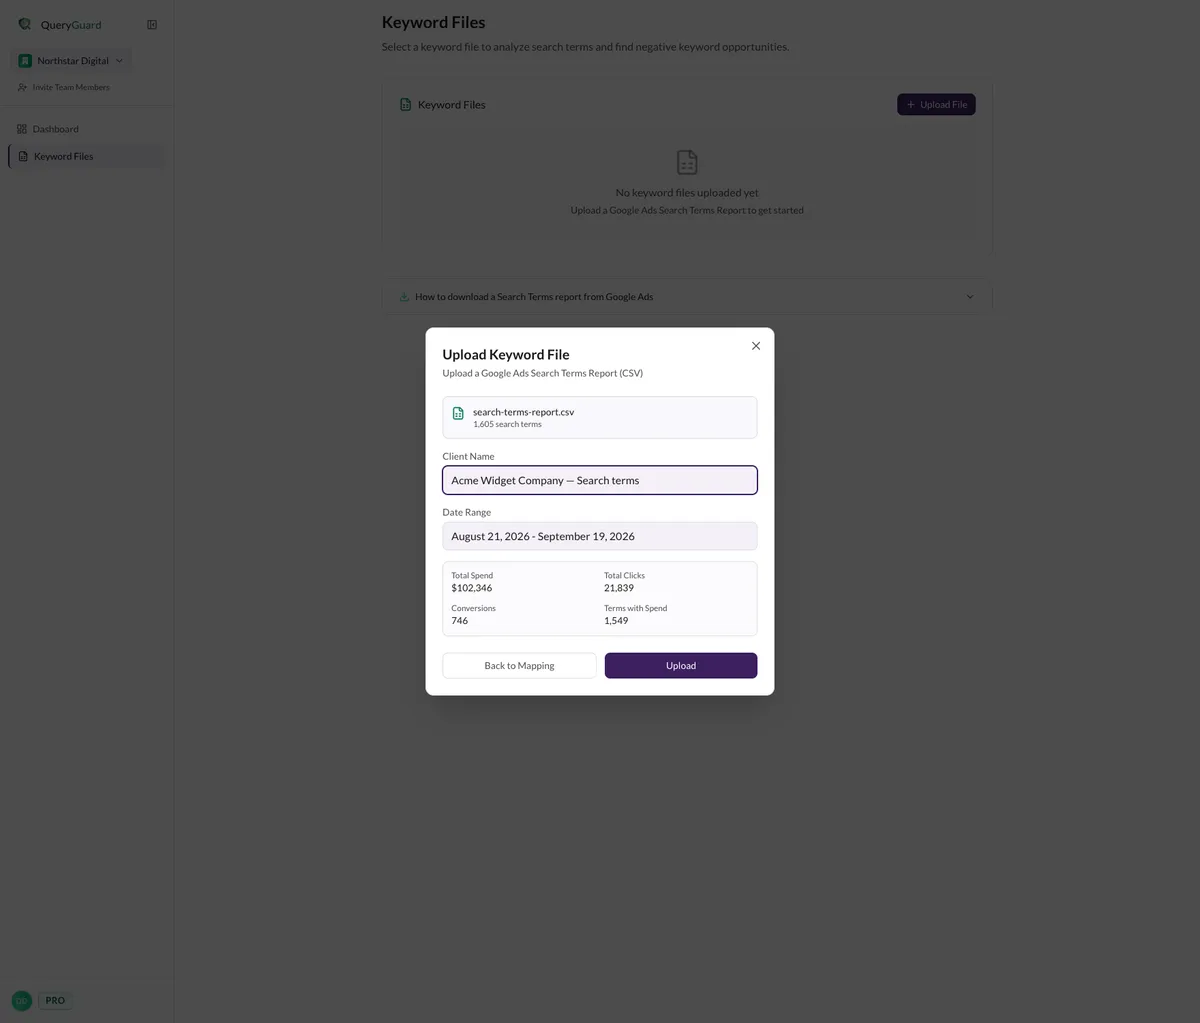
Fix anything with Back to Mapping, then choose Upload.
5. Track the progress on the file card
The window closes and a card for the file appears in the list. It runs through Processing N search terms… with a percentage bar, then Analyzing waste patterns…, and finishes with a green Upload complete — N terms imported before settling into a clickable card showing the term count and total spend.
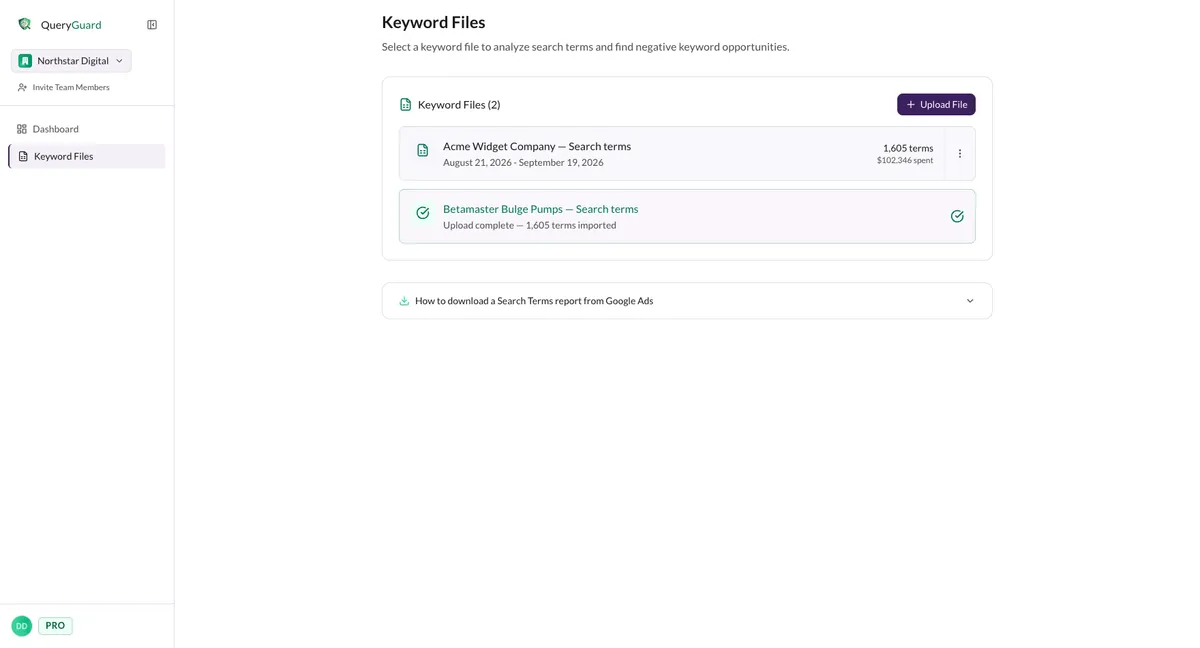
To abandon an upload while it's running, click the X on its card and confirm — partially imported data is removed. If an upload fails, the card turns red with the error and offers Retry and Remove.
6. Open the analysis
Click the card to open the file's page: name and date range at the top, then six stat cards — Search Terms, Total Spend, Total Clicks, Conversions, Cost/Conv, Cost/Click — covering the whole file. There's no date picker; the file's range is fixed at upload.
Two tabs do the analysis:
- Waste Report (default) — the same Waste Analysis panel and category cards a connected account gets. See The Waste Report.
- Data Explorer — the same searchable, sortable, filterable term table. On a file it's read-only: no row selection or bulk actions, no Keyword column, and term names don't open a detail view. See The Data Explorer.
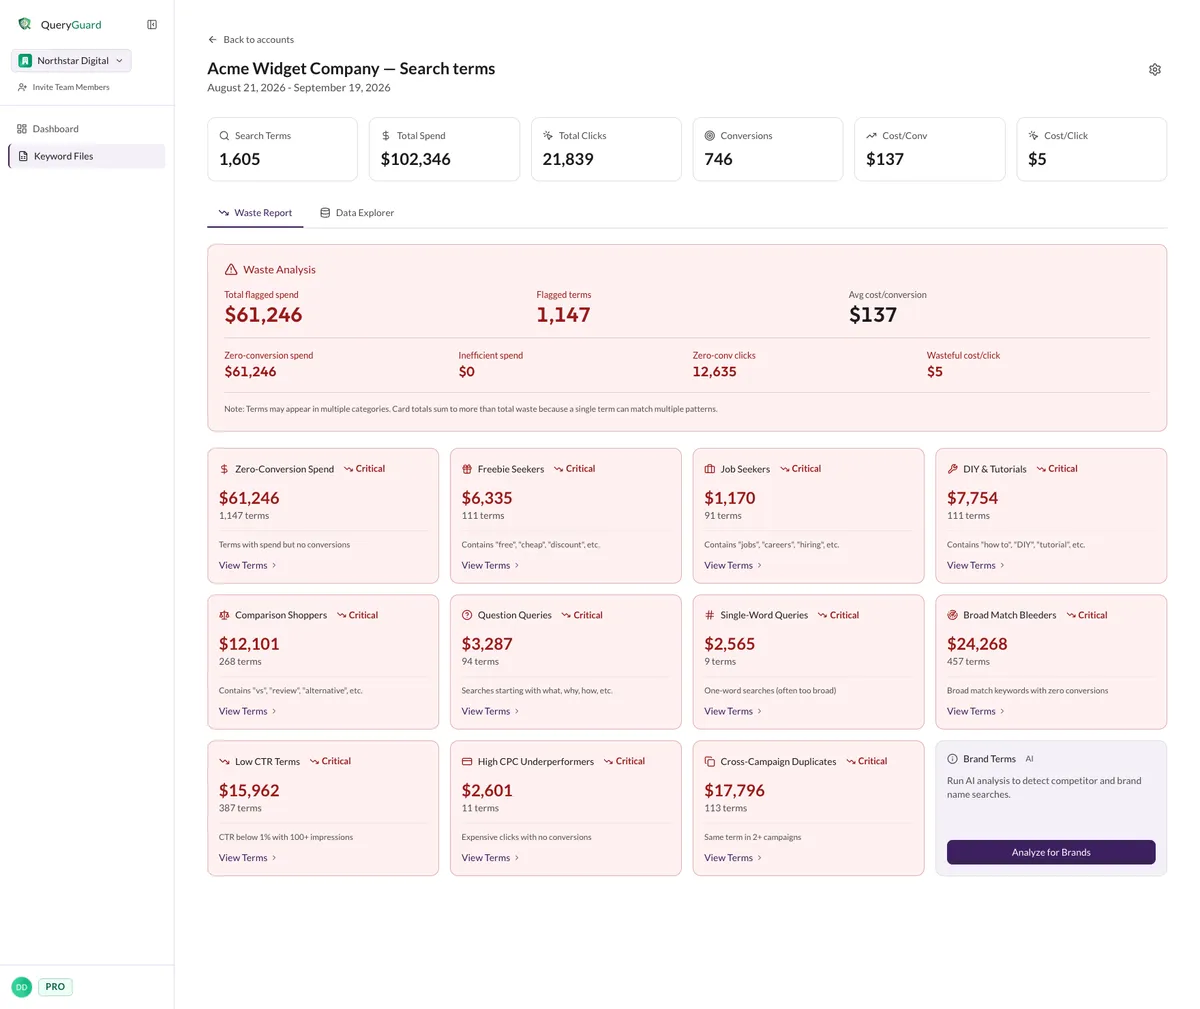
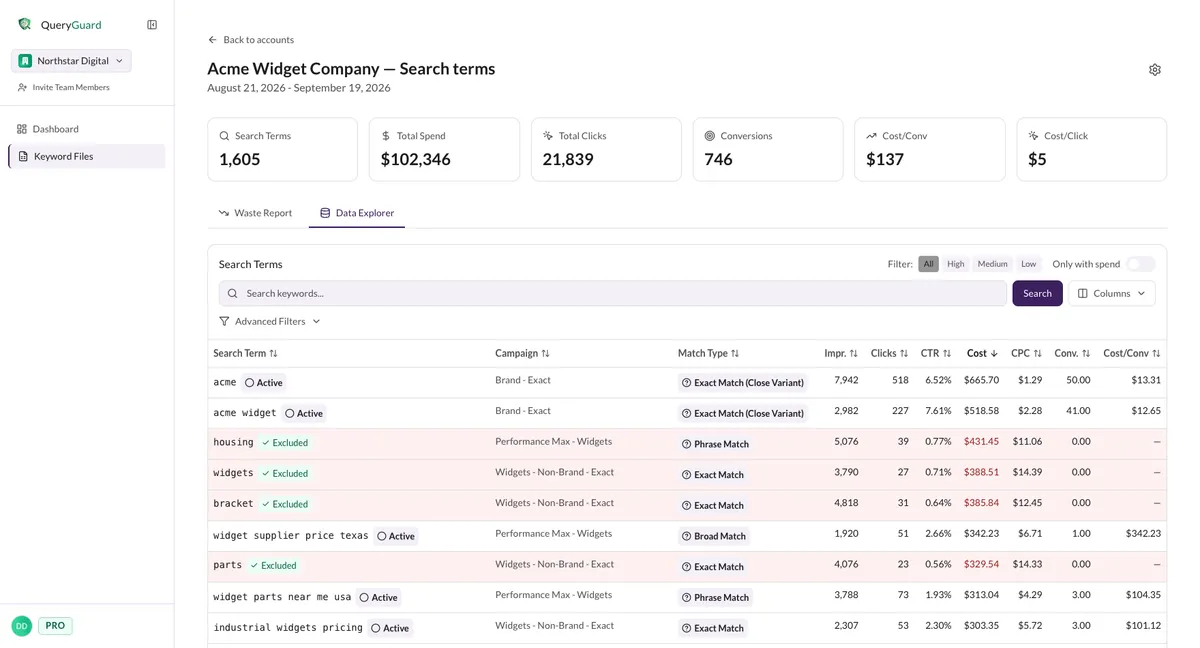
Use the findings as your exclusion list — the wasteful terms it surfaces are the ones to add as negatives in Google Ads.
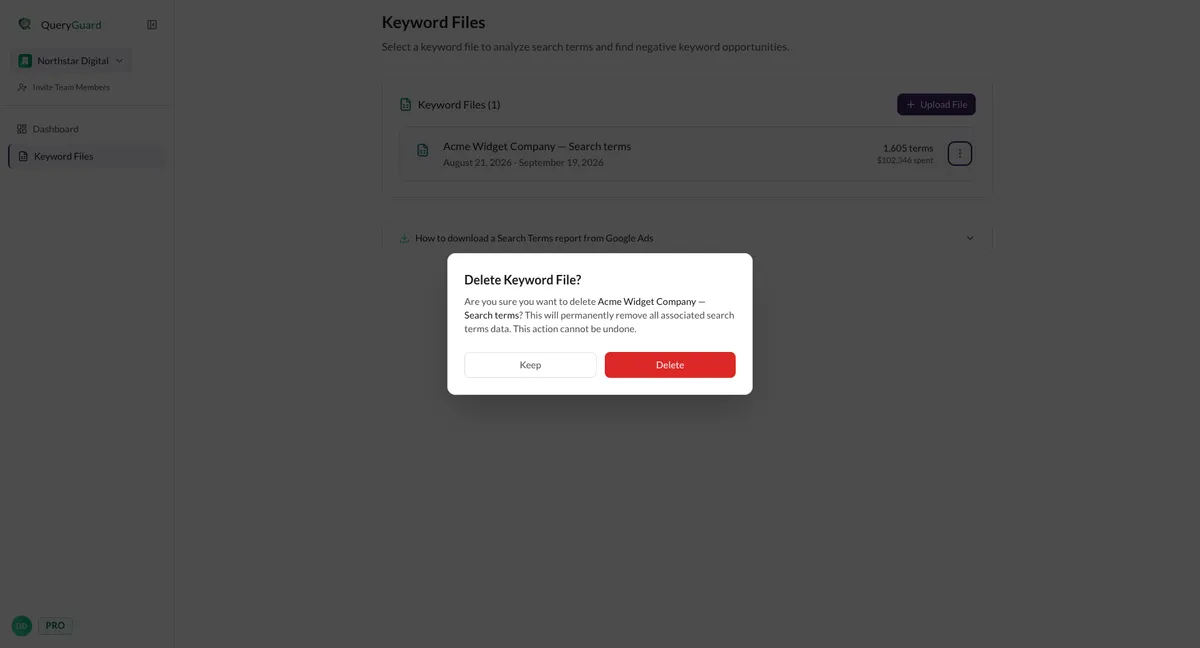
7. Delete a file
Two routes to the same action:
- On the Keyword Files list, open the ⋯ menu on the file's card and choose Delete File.
- On the file's own page, open the settings gear and choose Delete Keyword File.
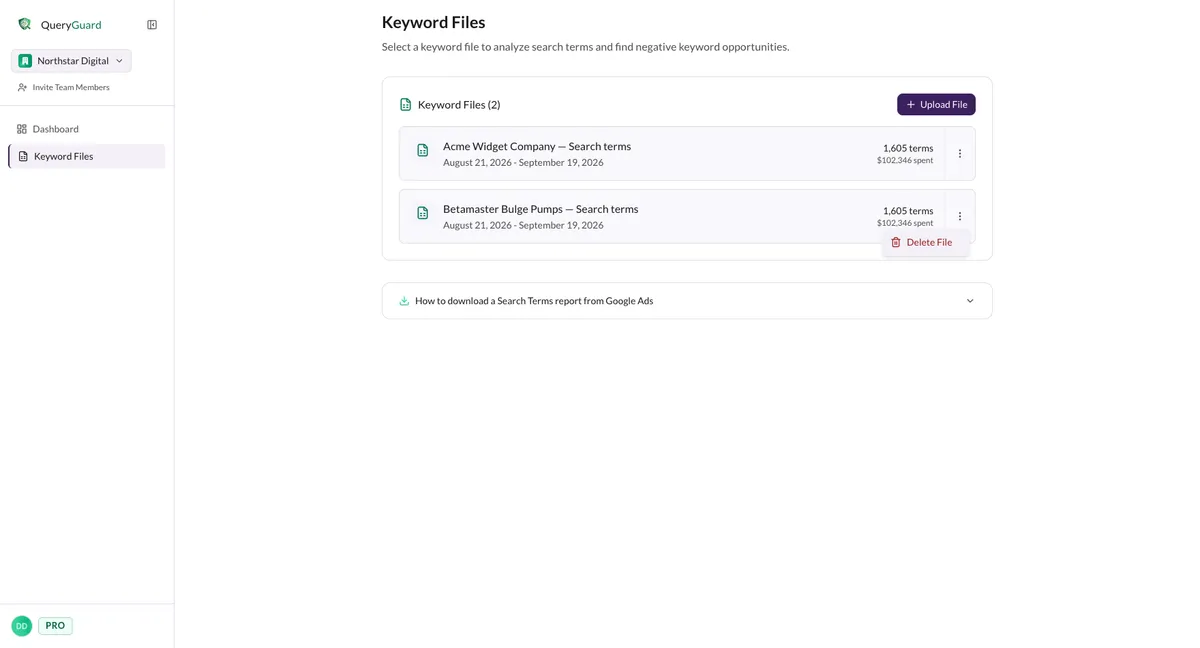
Confirm in the Delete Keyword File? dialog. Deletion permanently removes the file and all its imported search-term data — it can't be undone — and frees the slot on Starter.