
Your first 30 minutes
From a fresh sign-in to your first excluded search term in about half an hour: connect Google Ads, let the first sync run, work the top of the alerts list, and switch on alert delivery so new waste finds you.
Overview
The shortest path to value looks like this:
| Step | Where it happens |
|---|---|
| 1. Connect Google Ads | Connect Google Ads on the dashboard |
| 2. Wait for the first sync | Automatic — watch for the Your data is ready email |
| 3. Review the Waste Report | The account's Waste Report tab |
| 4. Triage the alerts | The Alerts tab |
| 5. Add negatives | Resolve → Add as negative keyword |
| 6. Set alert delivery | Workspace settings → Alert settings |
| 7. Invite the team | Invite Team Members in the sidebar, then share the workspace |
If you want the concepts first, What QueryGuard does explains the workspace model, and Navigate the dashboard tours the home screen.
Direct link: Dashboard
Quick Tips
- Don't wait on the first sync — it starts the moment you connect, and the Your data is ready email tells you when it's done.
- Work the Alerts tab top-down; it's already ordered so the most expensive terms come first.
- Not every flagged term is waste. Accept (not wasteful) on the ones that are fine clears the alert without touching your campaigns — a term that keeps spending can alert again, so exclude the ones you want gone for good.
- Inviting a teammate doesn't share account data — share the workspace, or they can verify their own Google Ads access from its card.
Steps
1. Connect your Google Ads account
On an empty dashboard, the Create your first workspace callout leads with Connect Google Ads. Sign in with the Google account that has access to the ad account, then pick which accounts to connect: the Select Accounts to Connect list is searchable by name or ID and groups accounts under their manager. Choose Connect Selected.
Each account lands in its own workspace, named after the account — one Google Ads account per workspace, so an agency typically ends up with one workspace per client. You can also Create Workspace first and attach the account later from the workspace's settings. The picker, plan limits and error cases are covered in Connect Google Ads.
Back on the dashboard, a banner confirms the connection:

2. Wait for the first sync
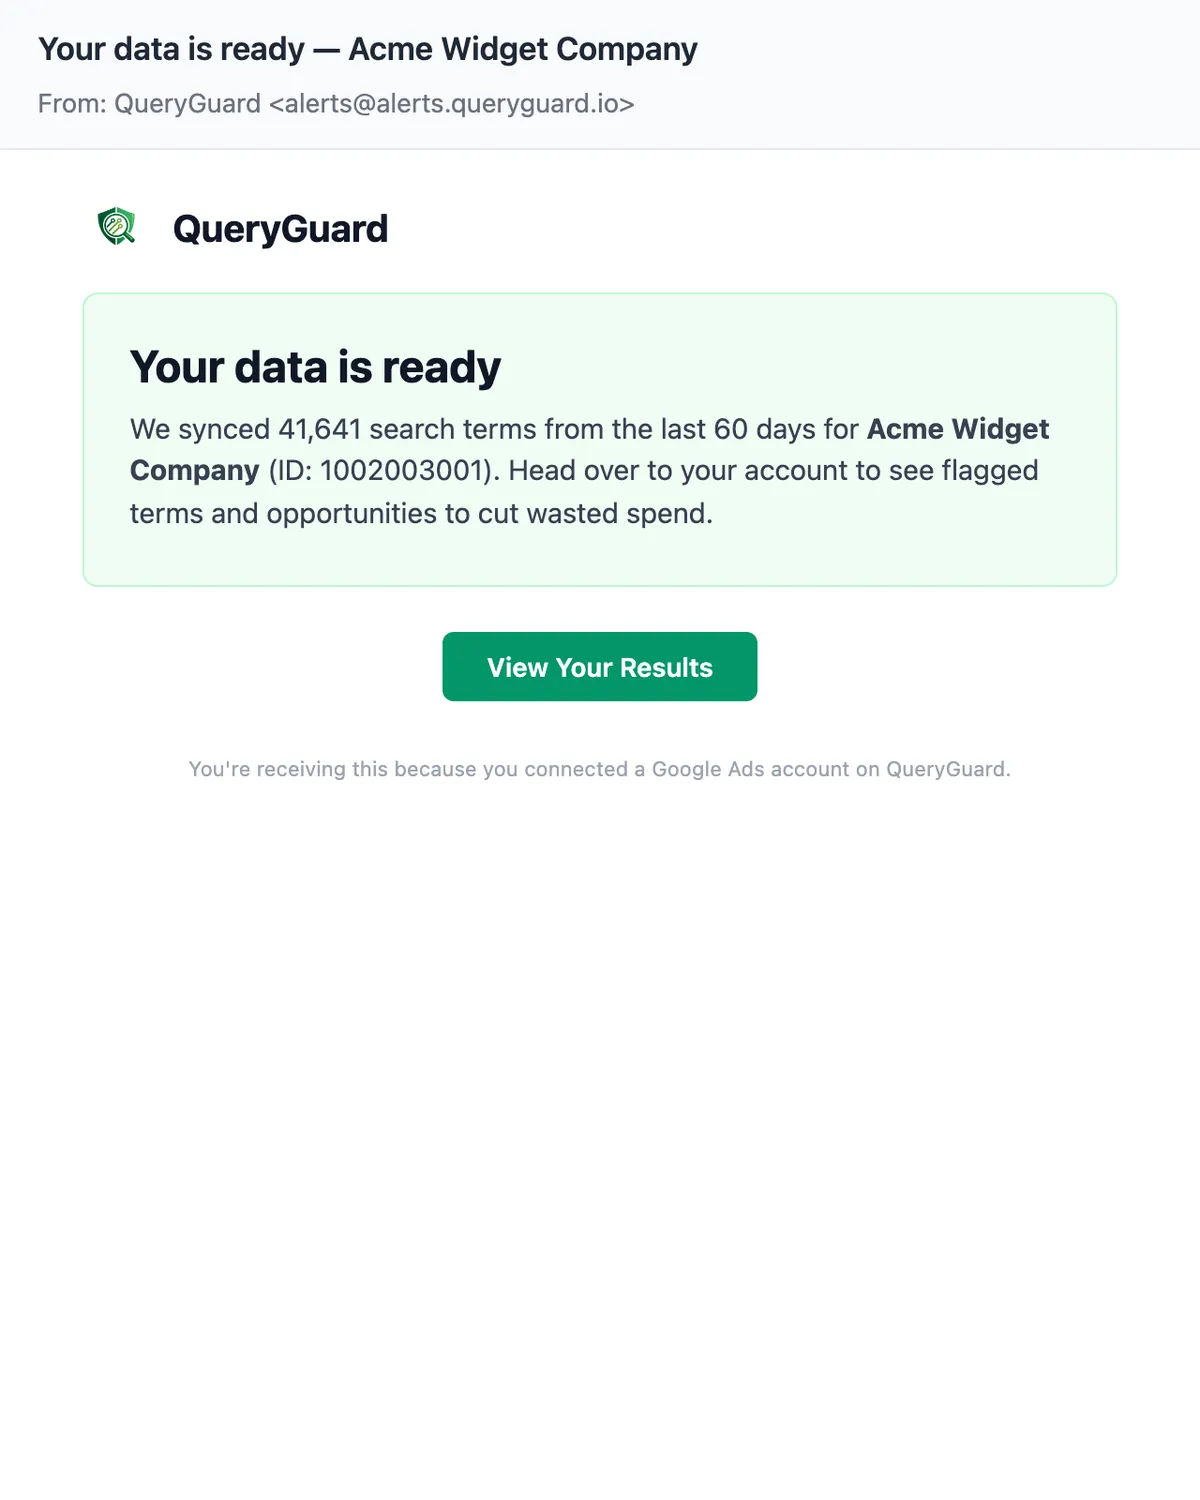
The first sync starts right away and usually takes a few minutes — the banner is right that you can safely leave the page. When it finishes, your org admins get the Your data is ready email, which reports how many search terms synced from the last 60 days and ends with View Your Results, a direct link into the account.
After that, the account syncs each night on its own — the Synced pill on the account header always shows when the last run finished.
3. Review the Waste Report
Open the account from its workspace card and switch to the Waste Report tab. It groups every flagged search term into categories — Zero-Conversion Spend, Freebie Seekers, Job Seekers, Broad Match Bleeders, and more — with the spend behind each.
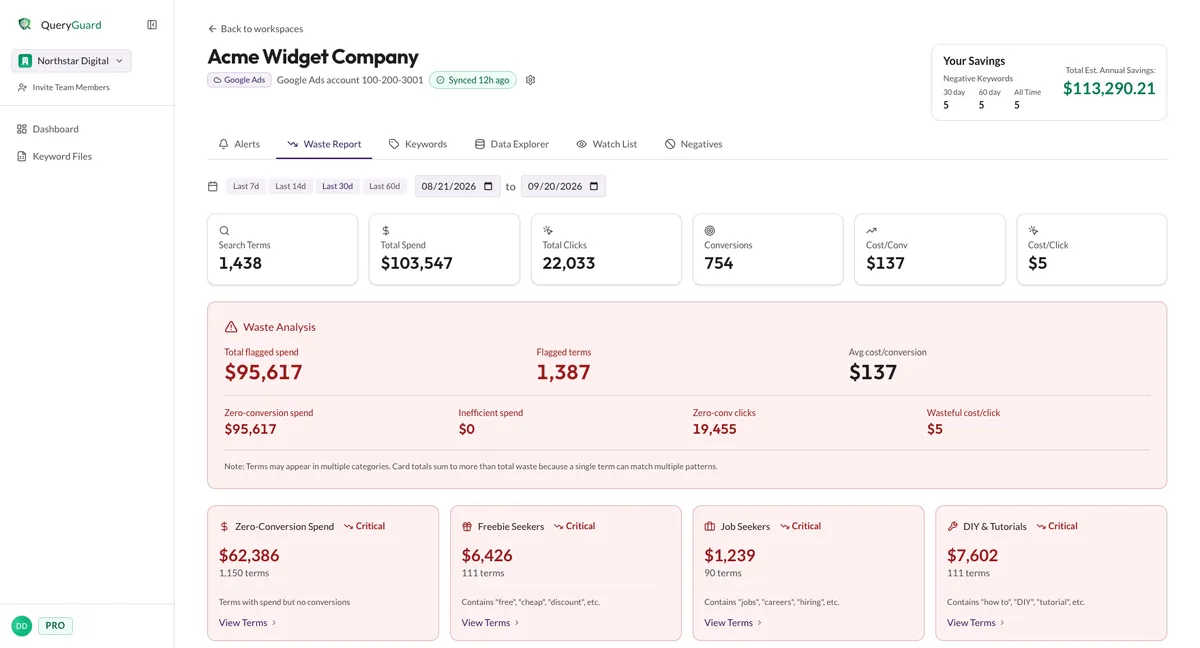
This is your map of where the money is leaking. Start with the biggest categories; View Terms on a card lists the actual search terms driving it. The Waste Report covers what every category catches.
4. Triage the alerts
The Alerts tab is the working queue: search terms that crossed the workspace's alert thresholds, most expensive first. Each row shows clicks, spend, severity, and the reason it was flagged — a term with real spend and zero conversions.
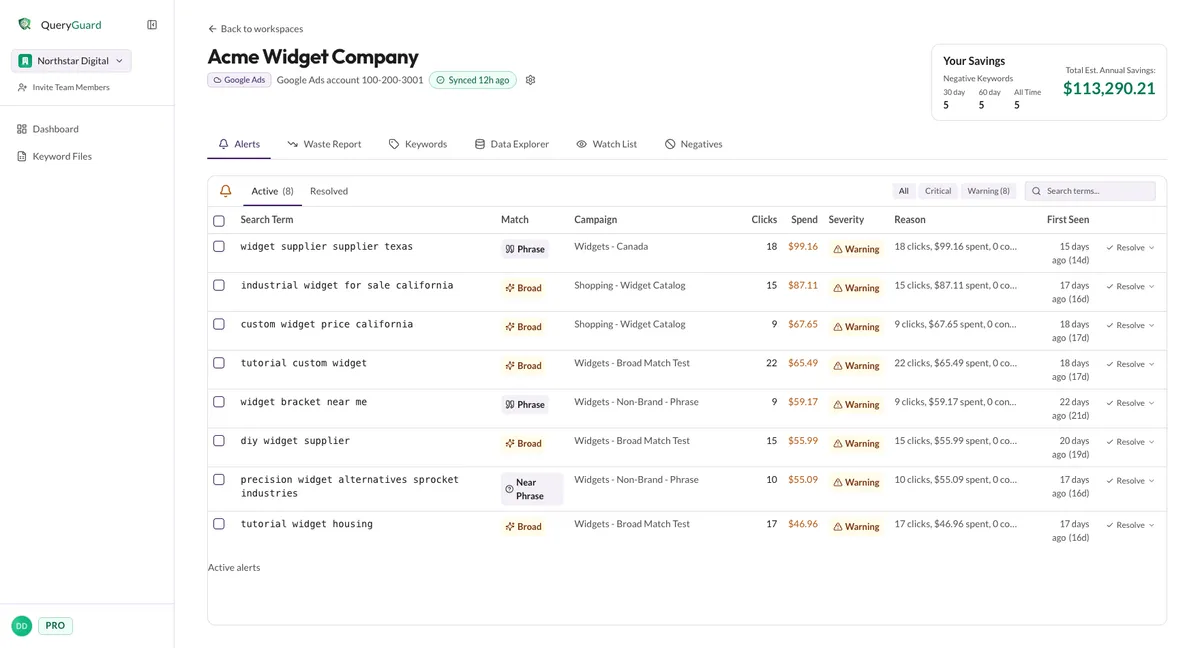
The Resolve menu on each row offers Add as negative keyword, Accept (not wasteful), View in Data Explorer, and snoozing for 14–60 days. Decide each one; you don't have to exclude everything — Resolve alerts covers what each option does and how to undo it.
5. Add your first negative keywords
For a term that's clearly waste: Resolve → Add as negative keyword, pick the match type — Exact is the safe default — and choose Exclude Term. QueryGuard writes the negative straight to the campaign in Google Ads and marks the term Excluded wherever it appears. The full walkthrough, including bulk exclusions from the Data Explorer, is in Add negative keywords.
Every exclusion carries an estimated annual savings figure that rolls up to the account's Your Savings card, and you can change or remove a negative later from the Negatives tab.
6. Set alert delivery
Alerts keep coming as new terms cross your thresholds, so decide where they go. From the account page, the gear icon opens Workspace settings; the Alert settings section is at the top.
- My Alert Preferences controls how often you're emailed for this account. Choose Daily to catch new waste as it appears.
- Delivery Channels covers the shared routes: add Team Emails addresses for people who should get alert digests without signing in, or connect Slack.
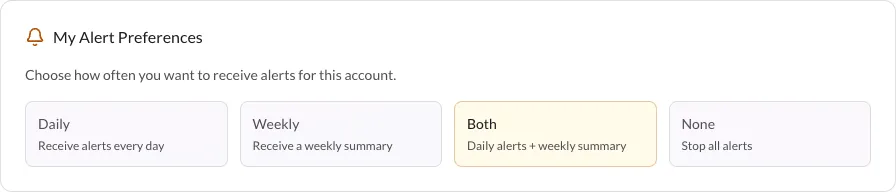
Teammates who didn't connect the account aren't subscribed automatically — the account page shows them a Get alert notifications for this account? banner where they can opt in. The full setup, including Team Emails and test alerts, is in Alert notifications.
7. Invite the team
Invite Team Members in the sidebar opens your organization's member list; Invite adds teammates by email. It only appears for org admins — Invite your team covers roles and managing members.
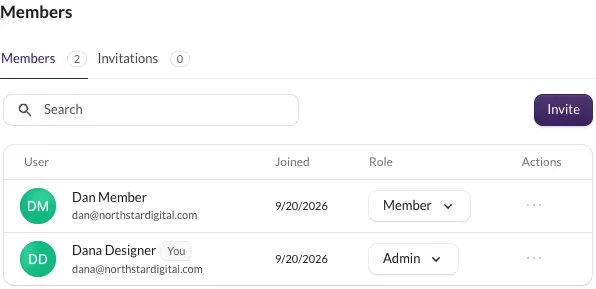
An invited member can sign in straight away, but a workspace's account data stays hidden until it's shared with them. Open the workspace's settings and use Team access → Share with a teammate:
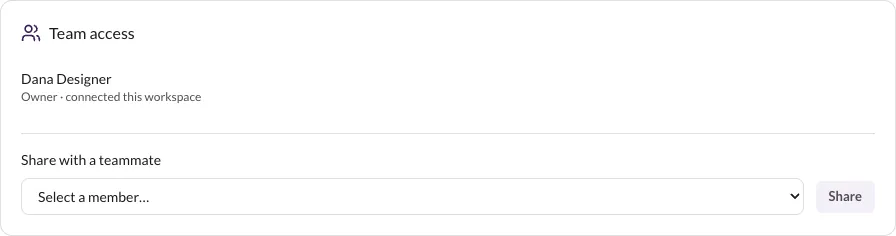
Members can also get in on their own: the workspace card on their dashboard offers to verify their Google Ads access instead of waiting for a share — see Share workspace access.